 Save to Pinterest
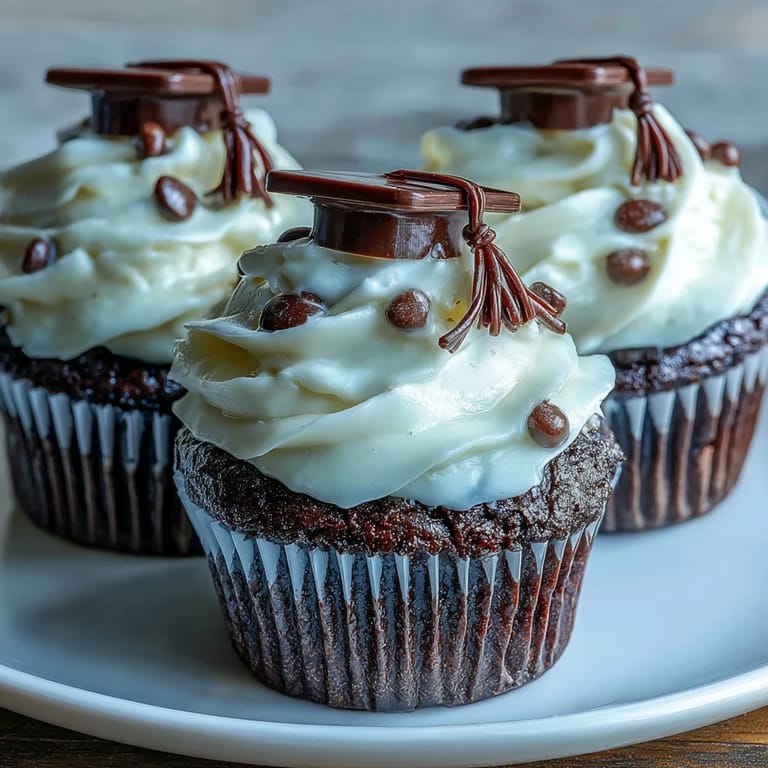
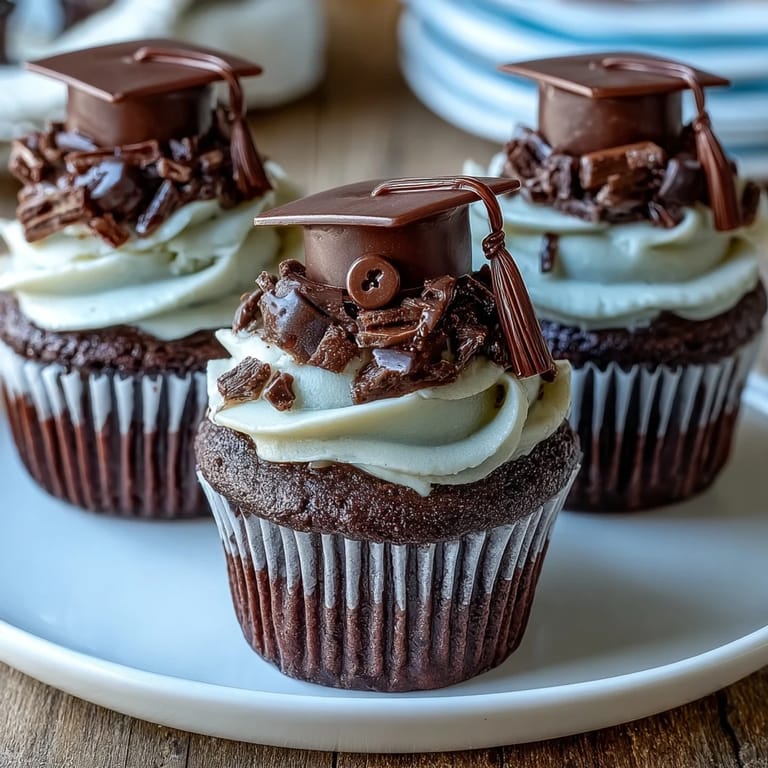
 My sister called me in a panic two weeks before her graduation, asking if I could make something special for her party. I'd never attempted edible graduation caps before, but there was something about the challenge that excited me—the idea of turning a simple cupcake into a tiny celebration you could hold in your hand. Standing in my kitchen that afternoon, surrounded by chocolate squares and licorice strings, I realized this wasn't just about baking; it was about marking a moment that mattered to someone I loved.
I'll never forget my sister's face when she saw the finished cupcakes lined up on the dessert table. She grabbed one immediately and held it up like a trophy, and suddenly everyone at the party wanted one too. By the end of the night, the platter was empty except for a few crumbs, and my sister texted me a photo the next day saying her friends were still talking about them.
Ingredients
- All-purpose flour: The foundation of your cupcake—make sure it's measured correctly by spooning it into your measuring cup rather than scooping directly from the bag, which can pack it too densely.
- Granulated sugar and softened butter: Creaming these together until pale and fluffy traps air into the batter, giving your cupcakes that tender, moist crumb that everyone expects.
- Eggs: Add them one at a time so they incorporate smoothly and create a stable emulsion with the butter.
- Whole milk: This keeps the batter from becoming too stiff and ensures each cupcake stays delicate inside.
- Baking powder and salt: Don't skip the salt—it actually enhances the vanilla flavor and balances the sweetness in a way you won't notice but will definitely taste.
- Pure vanilla extract: The real thing makes a noticeable difference; imitation vanilla can taste a bit flat in comparison.
- Powdered sugar for frosting: Sifting it before mixing prevents lumps and gives you that silky, spreadable consistency.
- Mini peanut butter cups: These become the crown of your graduation cap and add a fun flavor surprise—swap them for chocolate squares if you're serving anyone with nut allergies.
- Chocolate square candies: These form the flat base of each cap and should be sturdy enough to support the other pieces without cracking.
- String licorice or sour candy strips: Cut into shorter lengths for the tassel, and don't be shy about the color—bright red or gold feels especially celebratory.
- Mini M&Ms or candy pearls: A tiny dot on top of the cap mimics the button that holds a real graduation tassel in place, and it's surprisingly satisfying to place them.
Tired of Takeout? 🥡
Get 10 meals you can make faster than delivery arrives. Seriously.
One email. No spam. Unsubscribe anytime.
Instructions
- Set up your workspace:
- Preheat your oven to 350°F and line your muffin tin with paper liners. This step might feel like prep busywork, but it saves you from frantic scrambling once the batter is ready.
- Cream butter and sugar:
- Beat them together until the mixture looks pale and fluffy, like soft clouds—this usually takes about 3 minutes with an electric mixer. Add your eggs one at a time, beating well between each addition, then mix in the vanilla.
- Prepare your dry ingredients:
- In a separate bowl, whisk together the flour, baking powder, and salt. Whisking aerates the flour and distributes the leavening agents evenly.
- Alternate wet and dry:
- Add half the dry mixture to your butter mixture, stir until just combined, then add the milk, and finally the remaining dry ingredients. The key here is not overmixing—you want everything just combined, not a smooth, glossy batter.
- Fill and bake:
- Divide the batter evenly among the liners using a cookie scoop or spoon, filling each about two-thirds full. Bake for 18 to 20 minutes until a toothpick inserted in the center comes out clean or with just a few moist crumbs.
- Cool completely:
- Let the cupcakes cool in the tin for about 5 minutes, then transfer them to a wire rack. Frosting warm cupcakes will cause the buttercream to melt and slide off, so patience here really matters.
- Make your frosting:
- Beat softened butter until smooth, then gradually add the sifted powdered sugar a bit at a time. This gradual approach prevents clouds of sugar from puffing up in your face and ensures even distribution.
- Finish the frosting:
- Add milk, vanilla, and a pinch of salt, then beat until light and fluffy. The texture should be spreadable but hold a swirl—if it's too soft, add a little more powdered sugar; if it's too stiff, add another teaspoon of milk.
- Frost the cupcakes:
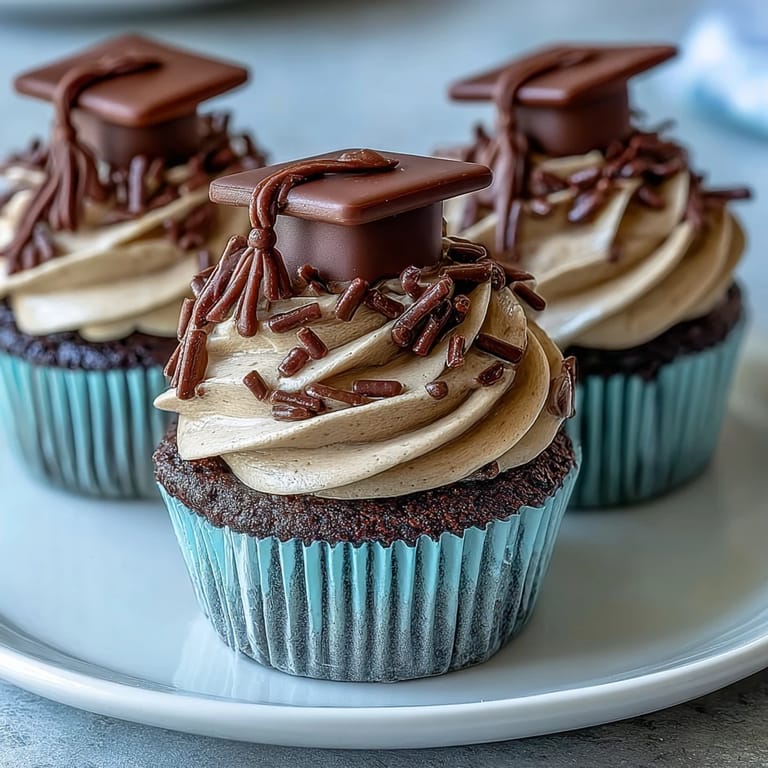
- Use a small offset spatula or the back of a spoon to apply a generous swirl of frosting to each cooled cupcake. Some people like neat swirls; others prefer a more casual pile—both look great and taste the same.
- Assemble the caps:
- Lay a chocolate square flat-side up, then secure a mini peanut butter cup upside-down in the center using a tiny dab of melted chocolate or frosting. Attach a piece of licorice as the tassel and top with a mini M&M or pearl.
- Let them set:
- Give the assembled caps a few minutes to firm up—this is a good moment to step back and admire your tiny edible mortarboards.
- Crown your cupcakes:
- Gently press each cap onto the frosting, positioning it slightly off-center for a more playful effect. They should nestle into the frosting without needing adhesive.
 Save to Pinterest
 What struck me most while making these wasn't the baking or even the decorating—it was the moment my sister brought them to her graduation party and watched people's faces light up. That's when I understood that the best recipes are the ones that celebrate the people we make them for, turning an ordinary afternoon into something memorable.
Making the Caps Look Professional
The secret to caps that don't look handmade (in a bad way) is making sure your chocolate base is truly flat and level before you add anything on top. If your candy squares are slightly warped, a gentle tap on the counter can sometimes help. When attaching the peanut butter cup, use just enough melted chocolate or frosting to secure it—too much and it becomes visible around the edges, making the whole cap look sloppy.
Color Customization Ideas
While the basic version is fun, personalization is where these cupcakes really shine. You can add gel food coloring to your frosting to match school colors, or stick with classic black buttercream if you want the caps to be the star. If you're making these for multiple graduates with different school colors, mix small batches of frosting in different colors rather than trying to divide one big batch—it saves headache and looks more intentional.
Storage and Serving Tips
These cupcakes taste best at room temperature, where the frosting has a silky texture and the cake is tender. If you need to make them ahead, bake the cupcakes and frosting a day in advance, but assemble the caps just a few hours before serving so they stay fresh and don't get knocked around in the refrigerator. For a party, arrange them on a tiered cake stand or a simple platter—let the caps do the talking.
- Store unfrosted or frosted cupcakes in an airtight container at room temperature for up to two days.
- Assemble the caps as close to serving time as possible so they stay pristine and photo-ready.
- If you're transporting them, stack them carefully in a sturdy box and drive slowly—these cupcakes are worth the caution.
 Save to Pinterest
 Making these cupcakes taught me that celebration baking is about more than technique—it's about showing up for the moments that matter. Every time you frost one of these and crown it with a tiny graduation cap, you're saying something beautiful without words.
Questions & Answers
- → How do I make the edible cap toppers?
Assemble the caps by attaching a mini peanut butter cup upside-down onto a chocolate square using melted chocolate or frosting. Add a licorice tassel and a mini candy button for detail.
- → Can I make these cupcakes nut-free?
Yes, substitute the peanut butter cups with chocolate square candies to avoid nuts in the toppings.
- → What is the best way to store the cupcakes?
Keep cupcakes in an airtight container at room temperature for up to two days to maintain freshness.
- → Can I customize the frosting color?
Absolutely, add food coloring to the buttercream frosting to match school colors or your preferred theme.
- → How long does preparation and baking take?
The overall process takes about 45 minutes, including preparation and baking time.