 Save to Pinterest
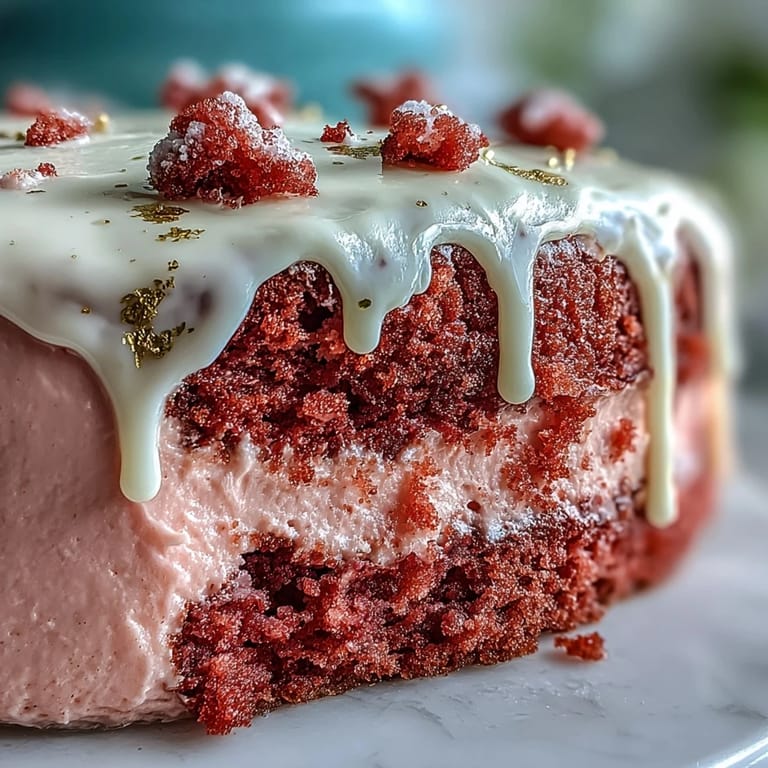
 The very first whiff of this cake, as it baked on a peaceful Sunday afternoon, caught me off guard. There was this subtle, gently floral aroma from the rosé, mingling with cocoa and sweet vanilla—something delicate and almost celebratory floated through my kitchen. I was thinking of all the milestone gatherings that deserved a dessert as blushing and festive as the moment itself. Rather than a typical pink confection, I wanted something adults and dreamers alike would remember. This Gold Drip Rosé Velvet Cake was the result, a centerpiece that honestly made me smile with every layer assembled.
I baked this cake for my friend’s bridal shower last spring, where laughter echoed louder than the playlist, and every slice disappeared faster than I could replenish the dessert table. The bride barely let her fork touch the plate before asking if I’d share the recipe, and several people asked if I’d also made the gold drip (I had, with a trembling hand and a giggle when I dripped a bit down the cake stand). There’s something show-stopping about it that just matches the excitement of a new chapter. The photos—adorned with blushing cake, sparkling glasses, and gold touches—are still some of my favorites. Even those usually shy about sweets went back for a second sliver, just for the rosé notes and creamy layers.
Ingredients
- All-purpose flour: The cake’s structure depends on it; I always spoon and level to avoid a dense crumb.
- Granulated sugar: Essential for that tender texture—beat it well with butter for fluffiness.
- Baking soda & baking powder: Both give the layers that lift and softness; double-check they’re fresh for best results.
- Salt: Don’t skip it; a little truly balances all the sweet notes.
- Unsweetened cocoa powder: This hint of chocolate is what transforms this from just another pink cake into a velvet treat.
- Unsalted butter: Softened is key; I leave mine out ahead of time for the smoothest batter and creamiest frosting.
- Buttermilk: Its tang makes the crumb extra tender—don’t substitute regular milk if possible.
- Rosé wine: Choose one you’d actually sip—its fruity character shines in both cake and frosting.
- Eggs: Room temperature helps them blend in smoothly, trust me.
- Vanilla extract: A little good vanilla takes the whole flavor up a notch.
- White vinegar: It reacts with the baking soda for a lifted cake—and you won’t taste it at all.
- Pink food coloring gel: Use sparingly; I start with just a toothpick’s worth for the perfect blush.
- Cream cheese: For that classic silky tang in the frosting—always soften deeply before beating.
- Powdered sugar: Sift it for the smoothest, lump-free frosting possible.
- Heavy cream: Makes the gold drip silky; add little by little when melting white chocolate.
- White chocolate chips: Melted down for the drip; a good quality makes a big difference in shine.
- Edible gold luster dust: This is what turns heads—don’t worry if you make a mess at first, the shimmer is worth it.
- Vodka or clear extract: Just enough to loosen the gold dust and help it glide on the chocolate drip.
Tired of Takeout? 🥡
Get 10 meals you can make faster than delivery arrives. Seriously.
One email. No spam. Unsubscribe anytime.
Instructions
- Prep the pans:
- Line your cake pans with parchment, greasing every inch—I always run my fingertips along the edges to double-check.
- Mix dry ingredients:
- Whisk together flour, cocoa, leaveners, and salt; the cocoa’s aroma should sneak up as you sift.
- Cream butter and sugar:
- Beat until fluffy and pale, letting the mixer do the heavy lifting for about three minutes.
- Add eggs and vanilla:
- Crack in eggs one by one, blending and scraping the bowl, then splash in vanilla for a cozy scent.
- Combine wet and dry:
- Alternate adding buttermilk and rosé with the sifted dry mix, folding gently until the batter looks glossy and soft.
- Tint the batter:
- Dot in pink gel food coloring, swirling it slowly until the color matches a spring blush—stop before it skews too bright.
- Bake the layers:
- Divide batter evenly, slide pans into the oven, and resist opening the door; the tops will spring back when pressed lightly.
- Cool completely:
- Let the cakes settle in their pans for a bit, then transfer to wire racks—I sometimes place a fan nearby to help if I’m impatient.
- Make the frosting:
- Beat cream cheese and butter till smooth, then add powdered sugar gradually followed by the rosé and vanilla for a silky finish.
- Assemble and crumb coat:
- Stack and fill each layer with frosting, smooth around the sides, chill briefly, then frost all over for a dreamy cloud effect.
- Create the gold drip:
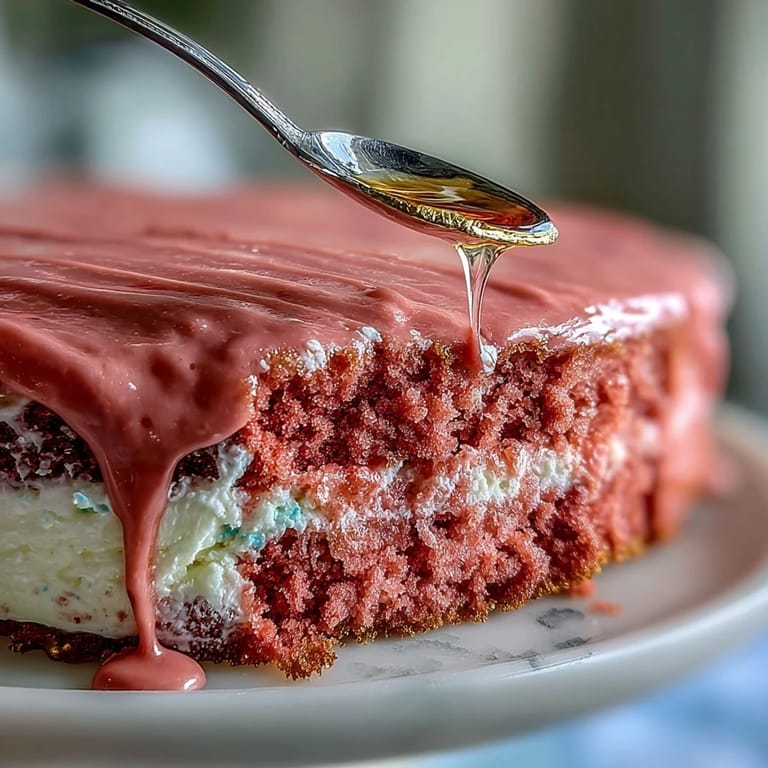
- Melt white chocolate with cream, cool until just pourable, then drip over the cake’s chilled edge—watching it cascade is half the fun.
- Paint with gold:
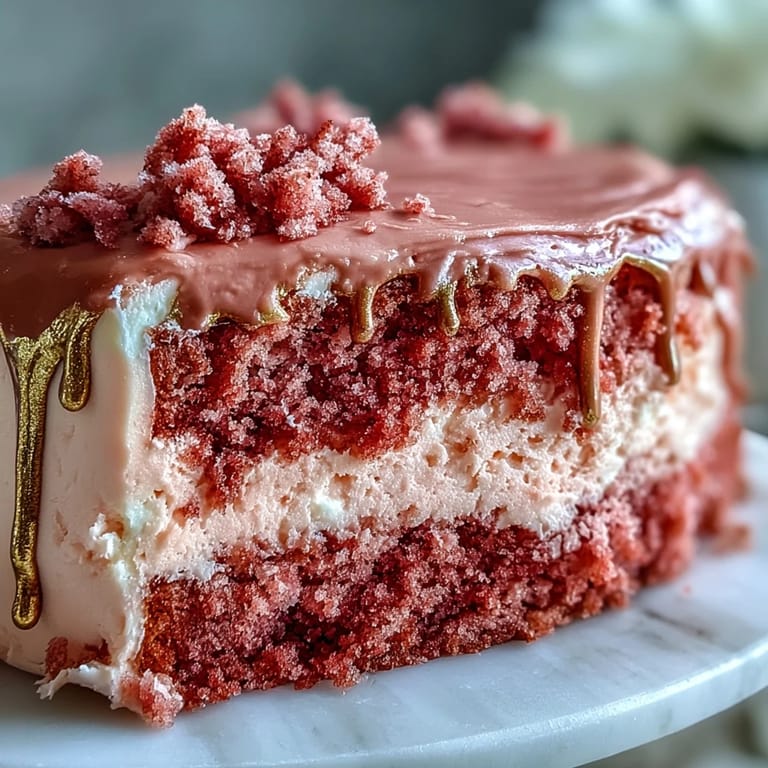
- Mix gold dust with vodka, then carefully brush onto the chocolate drips; little strokes create a dazzling, regal shimmer.
- Chill and serve:
- Refrigerate until everything is set and gold, then cut generous slices (the inside looks even lovelier than you imagine).
 Save to Pinterest
 There was a moment during the celebration when everyone paused mid-conversation just to admire the shimmering cake as it caught the evening light—someone even said it felt too pretty to cut. That shared gasp and laughter turned dessert into a highlight no one expected, and for me, it became about more than just mixing and baking; it was a little edible joy to mark something big together.
How to Make the Gold Drip Shine
Brushing the luster dust over the drip is like adding jewelry to the cake—a little patience, a soft brush, and gentle hands are the real tricks. I learned quickly to use just a dab of vodka (the alcohol evaporates) to get a smooth, painterly gold finish that actually looks flawless in photos. Practice your brush strokes on parchment first if you want, but honestly, a slightly imperfect drip just feels festive and homemade. It’s the gold that elevates this cake from fancy to unforgettable guest of honor.
Decorating Ideas for Bridal Bliss
After painting on the gold, I like to crown the cake with a mix of fresh edible flowers—pale pinks and whites are my go-tos—and the occasional sprinkle of gold leaf for true celebration flair. Raspberries, strawberries, or even a few sugared rose petals make a pretty and tasty finish. You can also keep things simple and minimalist, letting the blush and gold take center stage—don’t be afraid to let your personal style guide you.
Why This Cake Works for Special Occasions
There’s something about the gentle rosé flavor and creamy, dreamy frosting that makes gatherings feel instantly elevated; it’s not just dessert, it’s a centerpiece people remember. Whether you serve it at a shower or any shimmering, meaningful event, it invites plenty of smiles around the table. Share it with those who love a little sparkle in their sweets.
- If you want to go alcohol-free, sparkling grape juice is a perfect swap.
- Make the layers in advance and freeze—frosting hides any bumps.
- Remember to have extra napkins handy; gold flakes have a mind of their own!
 Save to Pinterest
 Whipping up a Rosé Velvet Cake brings a little gold-dusted magic to any celebration table. Bake it for the people you love and watch as conversation and cake slices disappear side by side.
Questions & Answers
- → How do I get an even blush color?
Use a concentrated pink gel and add it gradually, mixing thoroughly between additions. Rosé in the batter will deepen the hue, so add color slowly until the desired blush is reached under natural light.
- → Can I substitute the rosé for a non-alcoholic option?
Yes—sparkling grape juice or a reduced fruit juice works well. Reduce any extra sweet liquid slightly and taste the frosting before finishing to balance sweetness.
- → How do I achieve a controlled gold drip?
Cool the white-chocolate and cream mixture until slightly thickened so it flows slowly. Chill the crumb-coated cake first and apply the drip with a spoon or squeeze bottle, testing flow on the side before the final pass.
- → What’s the best way to level layers and stack neatly?
Trim domes with a serrated knife or leveler, place layers on a turntable, spread even amounts of frosting between layers, and use a bench scraper for a straight-sided finish.
- → How can I intensify the rosé flavor without soggy layers?
Brush a light coat of reserved rosé onto cooled layers before filling; avoid soaking. Fold a small amount of rosé into the frosting rather than adding large volumes to the batter.
- → Can components be made ahead of time?
Bake layers a day ahead and wrap tightly. Make frosting and the white-chocolate drip in advance; assemble and decorate the day of for best texture and appearance.