 Save to Pinterest
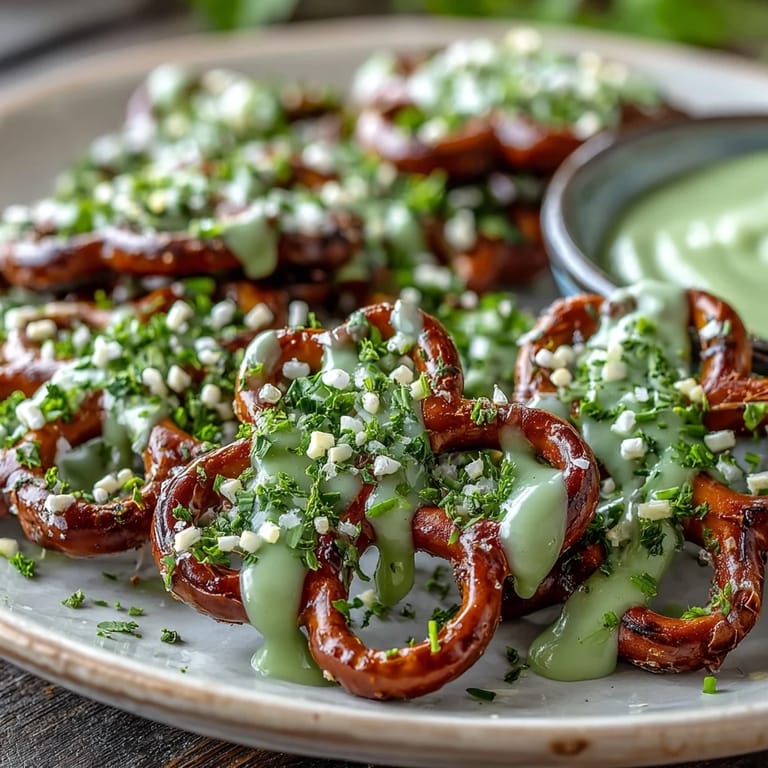
 My neighbor knocked on the door with a plate of these bright green shamrock pretzel bites last March, and I'll admit I was skeptical at first—until I bit into one and tasted that perfect combination of salty pretzel and sweet candy shell. She laughed when she saw my expression change and promised the recipe was embarrassingly simple, the kind you make while half-watching a St. Patrick's Day parade on TV. Now they're the one thing I'm known for bringing to every spring gathering, and people actually ask for them before I even walk through the door. There's something magical about how three tiny pretzels twisted together look so intentionally festive, and how a five-minute coating transforms them into something people assume took real effort.
I made these for my daughter's school St. Patrick's Day party, and watching her little classmates' faces light up when they saw the green shamrocks arranged on a platter felt like I'd catered a royal banquet. One kid came back for seconds before the party even officially started, and his mom asked for the recipe right there in the school hallway—that's when I knew I'd stumbled onto something special. Since then, they've become our unofficial family tradition, and my kitchen smells like melted candy and possibility every March.
Ingredients
- 90 small pretzel twists: These are your foundation, and their slight saltiness plays beautifully against the sweet coating—use the ones about the size of a quarter, not the giant ones.
- 30 mini pretzel sticks: These become your shamrock stems and honestly make the whole thing look intentional instead of accidental.
- 340 g (12 oz) green candy melts: Don't be tempted by regular chocolate here; candy melts are your friend because they harden fast and coat evenly without any fussing.
- 1 tsp coconut oil or vegetable shortening: This is optional but game-changing if your candy coating feels too thick—it thins things out without affecting the flavor.
- Green and white sprinkles or sanding sugar: Add these while the coating is still wet, or they'll slide right off and you'll end up with a disappointingly bare shamrock.
Tired of Takeout? 🥡
Get 10 meals you can make faster than delivery arrives. Seriously.
One email. No spam. Unsubscribe anytime.
Instructions
- Prep your workspace:
- Line a large baking sheet with parchment paper and make sure you have everything within arm's reach—once you start dipping, things move fast.
- Build your shamrocks:
- Arrange three pretzel twists so their curves touch in the middle, forming that classic three-leaf clover shape, then nestle a mini pretzel stick underneath as the stem. Repeat until you've got thirty shamrocks lined up like little edible clovers ready for their spa day.
- Melt the magic:
- Microwave your green candy melts in 30-second bursts, stirring between each one, until they're completely smooth and pourable—if it looks too thick, add your coconut oil and stir until it flows like silk. Trust your instincts here; thick coating means frustrated dipping.
- Coat with confidence:
- Using a fork or spoon, drizzle or spoon the melted candy over each shamrock shape, making sure every pretzel gets coverage and the pieces are actually bonded together—this is what keeps your shamrock from falling apart later. Work gently and don't overthink it; imperfect coating is part of the charm.
- Sprinkle while it's hot:
- Immediately after coating, shower each shamrock with your green and white sprinkles before the candy starts to set, because once it firms up, sprinkles won't stick no matter how much you convince them.
- Let it set:
- Leave everything at room temperature for twenty minutes, or speed things up by refrigerating for ten minutes until the coating feels completely firm and hard to the touch. The waiting is the hardest part.
- Finish strong:
- Once set, gently peel each shamrock away from the parchment and arrange on a platter—they're sturdy enough to handle now and actually look impressive when properly displayed.
 Save to Pinterest
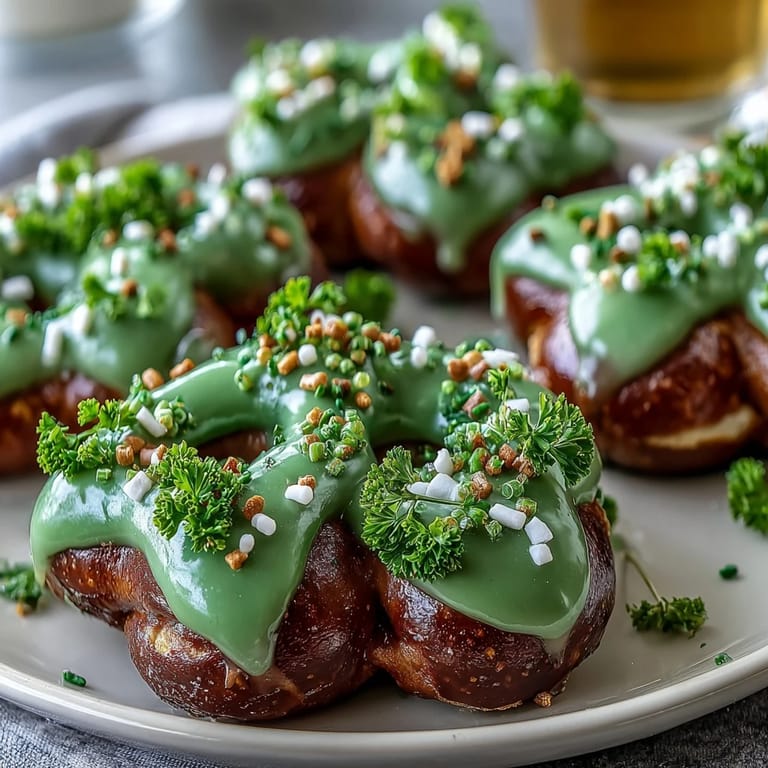
 These bites somehow became the thing that made my very serious mother smile at a family gathering, watching her meticulously arrange them on a serving platter like they were tiny edible jewels. That's when I realized these aren't just about St. Patrick's Day anymore; they're about creating a moment where something simple and homemade makes people feel genuinely happy.
The Pretzel-to-Candy Balance
The secret to these not tasting overwhelmingly sweet is respecting the salt on the pretzels—it's doing actual work in your mouth, keeping the candy coating from becoming cloying. Don't rinse your pretzels or try to use unsalted ones thinking you're being fancy; that salt is your flavor friend and it's doing heavy lifting. I learned this the hard way when I once made a batch with reduced-sodium pretzels because I was feeling virtuous, and they tasted more like pure sugar—lesson learned and never repeated.
Flavor Variations Worth Trying
Once you master the basic version, you can start playing with personality—white chocolate coating with green food coloring gives you a completely different aesthetic and slightly different flavor profile that some people actually prefer. A tiny drop of peppermint extract in your melted candy turns these into something that tastes vaguely holiday-ish even in the middle of summer, which is admittedly weird but also kind of wonderful. I've also experimented with adding a whisper of almond extract, which sounds strange until you taste it and realize it elevates the whole thing into something almost sophisticated.
Storage and Make-Ahead Magic
These actually improve slightly if you make them a day or two ahead because the coating firms up even more completely, and they become even sturdier to transport or handle. Store them in an airtight container at room temperature for up to five days, and they'll stay fresh and crispy rather than getting soft or sad. A helpful secret is to put a sheet of parchment between layers if you're stacking them, which prevents any shifting or accidental adhesion that ruins their presentation.
- Make them up to three days before you need them and store them in a cool, dry place away from direct sunlight.
- Don't refrigerate unless your kitchen is unusually warm; room temperature storage keeps them crispier.
- If you're transporting them, use a shallow container with a tight lid rather than stacking them on a plate where movement causes disaster.
 Save to Pinterest
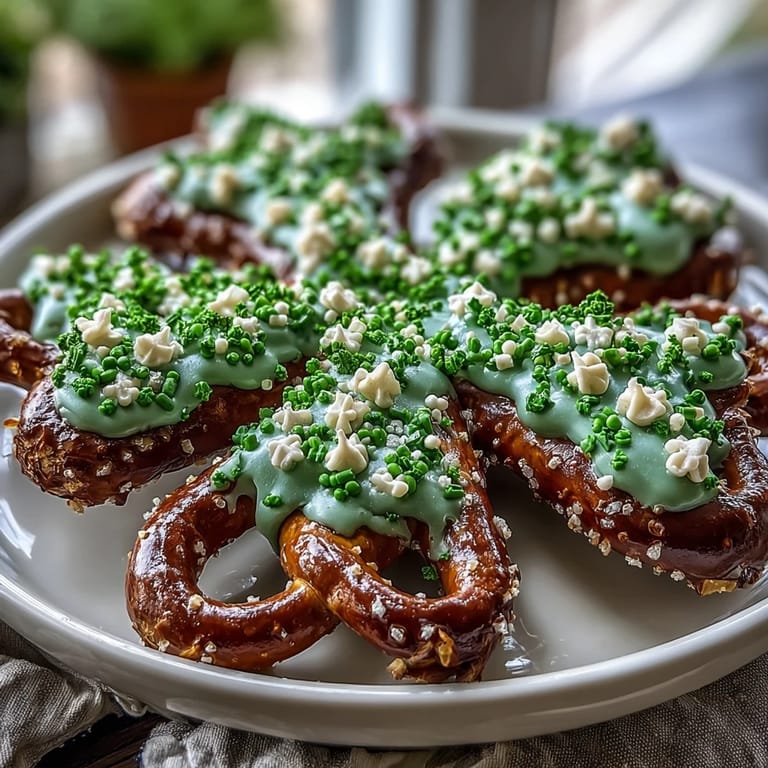
 These shamrock pretzel bites prove that impressive food doesn't require complicated techniques or fancy ingredients—sometimes it's just about combining simple things in a way that makes people smile. Make them, share them, and watch how quickly they become the thing people remember about your gathering.
Questions & Answers
- → How do I shape the pretzels into shamrocks?
Arrange three small pretzel twists in a cluster to form the leaves, placing one mini pretzel as a stem at the base.
- → What type of candy coating works best?
Green candy melts provide a smooth, sweet coating that sets well and holds sprinkles firmly.
- → Can I substitute the candy melts?
Yes, white chocolate mixed with green food coloring can be used for the coating as an alternative.
- → How long should the bites set before serving?
Let them set at room temperature for about 20 minutes or refrigerate for 10 minutes until the coating firms.
- → Are these pretzel bites gluten-free?
No, the pretzels contain wheat gluten, so they are not suitable for gluten-free diets.
- → Can peppermint extract be added to the coating?
Yes, adding a drop of peppermint extract to the candy coating enhances flavor and complements the sweetness.