Save to Pinterest
 I'd been experimenting with protein-packed desserts for weeks, throwing everything at the wall to see what would actually taste good. The day I decided to blitz cottage cheese into a cheesecake filling, I honestly thought it might be a disaster. But when that first forkful hit my tongue—silky, deeply chocolatey, with this subtle tang that cut through the sweetness—I knew I'd stumbled onto something special. Now it's the dessert I make when I want to impress people who claim they don't do healthy treats.
My sister was visiting last month, skeptical as always about my healthy dessert experiments. She took one bite of this cheesecake, set down her fork, and demanded I write down the recipe immediately. We ended up eating half the cake standing at the counter, talking about how something this indulgent could possibly be good for you. That's when I knew this wasn't just another experiment—it was going into the regular rotation.
Ingredients
- Graham cracker crumbs: These create the classic cheesecake foundation, and adding cocoa powder straight into the crust makes it extra chocolatey from bottom to top
- Coconut oil: I prefer coconut oil over butter here because it firms up beautifully in the fridge and adds a subtle sweetness that complements the chocolate
- Cottage cheese: The secret weapon that transforms this into a protein powerhouse while delivering incredible creaminess when blended until absolutely silky
- Greek yogurt: Adds tang and moisture while keeping the filling light and airy compared to traditional cream cheese versions
- Cornstarch: Just one tablespoon stabilizes the filling and prevents that dreaded cracking while keeping the texture smooth and velvety
- Dark chocolate: Melting chocolate directly into the filling creates that deep, sophisticated cocoa flavor that makes this feel genuinely decadent
Tired of Takeout? 🥡
Get 10 meals you can make faster than delivery arrives. Seriously.
One email. No spam. Unsubscribe anytime.
Instructions
- Prepare your canvas:
- Preheat your oven to 170°C (340°F) and line the bottom of an 8-inch springform pan with parchment paper—this step saves you so much heartache later when you're trying to remove the cake.
- Build the chocolate foundation:
- Mix the graham cracker crumbs, cocoa powder, coconut oil, and maple syrup until everything's evenly coated and resembles wet sand. Press it firmly into your pan, really getting into the corners, then bake for 8 minutes to set it.
- Create the silky filling:
- Blend the cottage cheese by itself first for 1–2 minutes until it's completely smooth—this is the most important step for texture. Add everything else except the melted chocolate and blend until combined, then drizzle in that cooled chocolate and blend until the mixture is glossy and uniform.
- Bake with patience:
- Pour the filling over your cooled crust, smooth the top, and bake for 35–40 minutes until the center is just set but still has that slight wobble. Turn off the oven, crack the door, and let it cool inside for an hour—this gradual cooling prevents cracks.
- The waiting game:
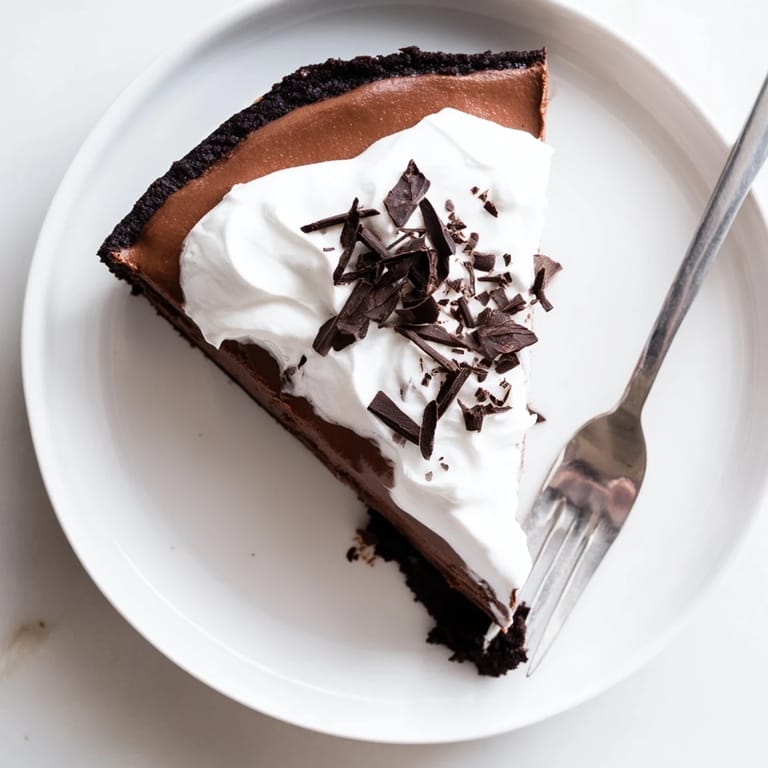
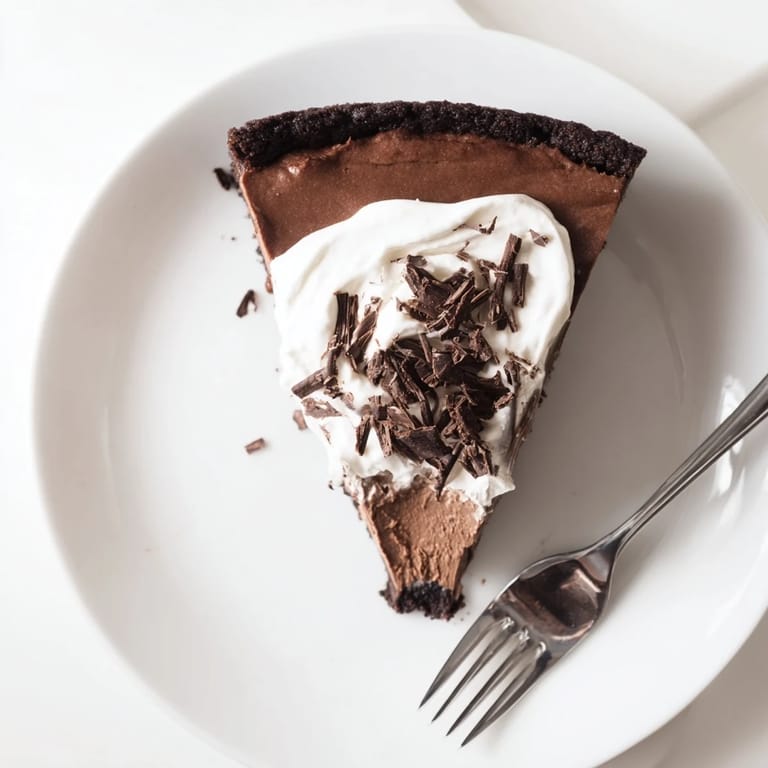
- Chill the cheesecake for at least 3 hours, but overnight is even better. The flavors really deepen and the texture becomes perfect. Top with a thin layer of Greek yogurt sweetened with honey and those chocolate shavings right before serving.
 Save to Pinterest
 This has become my go-to for dinner parties because people can't believe it's lighter. Last weekend, my friend who runs a bakery took one bite and immediately asked for the recipe—that's the moment I knew this was a keeper. There's something magical about serving a dessert that feels indulgent but doesn't leave you feeling weighed down afterward.
Getting The Texture Right
The first time I made this, I rushed the cottage cheese blending and ended up with tiny lumps throughout the filling. Now I blend it alone for a full two minutes, stopping to scrape down the sides, before adding anything else. The difference between a smooth, professional cheesecake and a grainy one really comes down to patience during this step.
Flavor Variations
Sometimes I swirl in raspberry jam before baking for a chocolate-raspberry version that's absolutely stunning. You can also add espresso powder to the filling for a mocha twist, or swap some of the cocoa powder for peanut butter powder. The base recipe is incredibly forgiving and adapts well to whatever flavors you're craving.
Make It Yours
Don't stress too much about the crust—crushed chocolate cookies work beautifully if you want to intensify the chocolate even more. I've made this without a crust entirely for a truly low-carb version, and it still holds its shape beautifully.
- Room temperature ingredients blend more smoothly, so set everything out about 30 minutes before you start
- If you don't have a springform pan, a regular cake pan lined with parchment paper that extends up the sides works too
- This cheesecake freezes exceptionally well, so feel free to wrap individual slices for future dessert emergencies
 Save to Pinterest
 There's something deeply satisfying about a dessert that nourishes as much as it delights. This cheesecake lives in that sweet spot where healthy meets indulgent, and I hope it becomes a staple in your kitchen like it has in mine.
Questions & Answers
- → Why use cottage cheese instead of cream cheese?
Cottage cheese significantly boosts the protein content while reducing overall fat. When blended until completely smooth, it creates an incredibly creamy texture that's nearly indistinguishable from traditional cream cheese-based versions, making it a smarter choice for satisfying chocolate cravings.
- → How do I achieve the smoothest texture?
Blend the cottage cheese for 1-2 minutes until absolutely no lumps remain before adding other ingredients. This step is crucial for achieving that silky, luxurious consistency. Scrape down the sides of the blender or processor bowl to ensure everything gets incorporated evenly.
- → Can I make this gluten-free?
Simply swap regular graham crackers for gluten-free alternatives. The rest of the filling ingredients are naturally gluten-free, making this an easy adaptation. Always check labels on processed ingredients like chocolate chips to confirm they're certified gluten-free if needed.
- → Why cool the cheesecake in the oven with the door cracked?
This gradual cooling method prevents the top from cracking by reducing temperature shock. The residual heat continues setting the center gently while allowing the structure to stabilize slowly. This extra step ensures a smooth, pristine surface perfect for toppings or serving as-is.
- → How long does this need to chill before serving?
Refrigerate for at least 3 hours, though overnight chilling yields the best texture and flavor development. The filling firms up beautifully during this time, making clean slices easier. The cocoa flavor also deepens and becomes more pronounced after resting in the refrigerator.
- → Can I add mix-ins to the filling?
Gently fold in chopped dark chocolate, fresh raspberries, or a swirl of peanut butter after blending but before pouring over the crust. These additions complement the chocolate beautifully while maintaining the smooth, creamy base. Keep mix-ins to about ½ cup total to preserve the silky texture.