Save to Pinterest
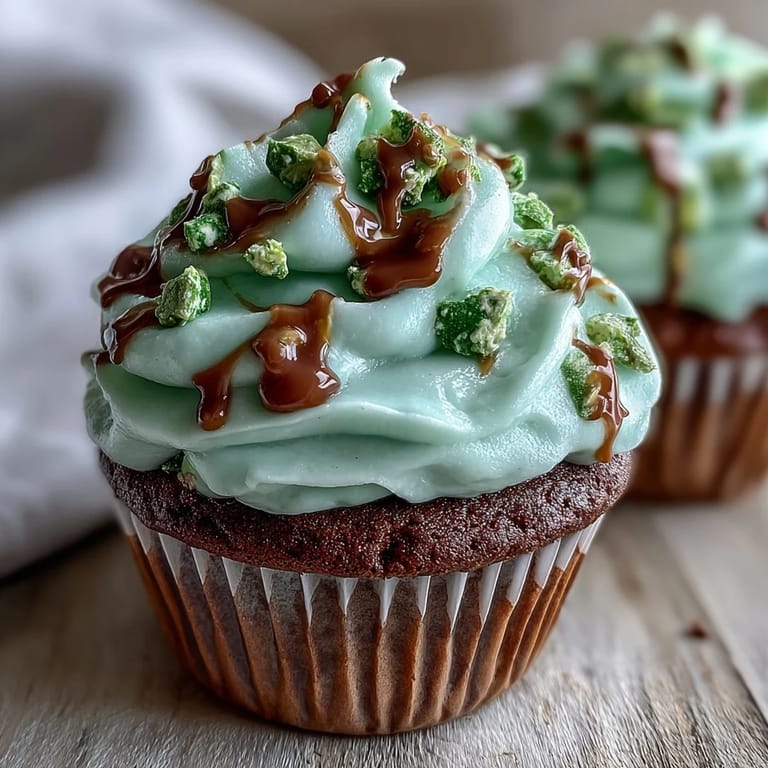
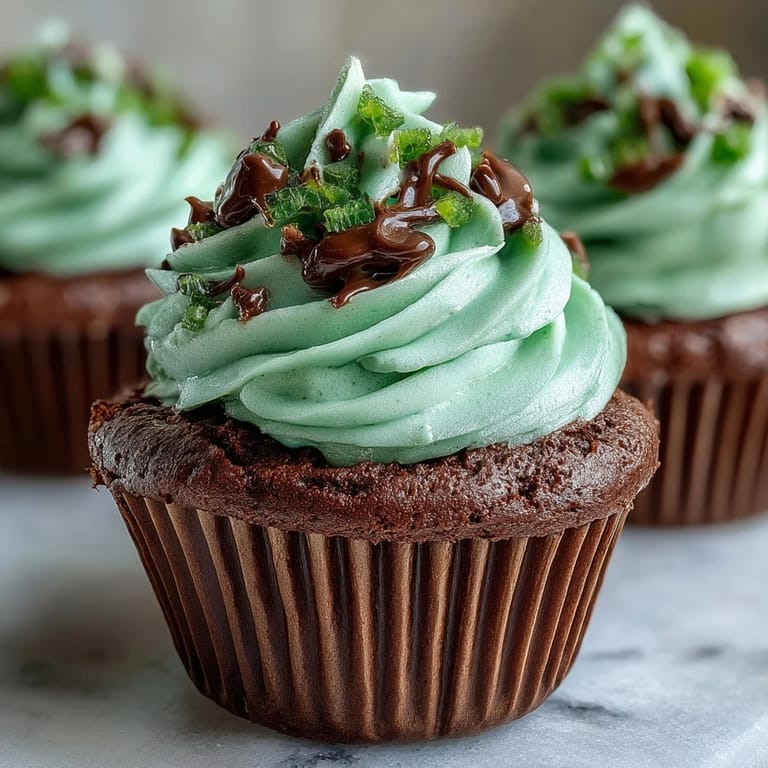
 My sister called me three days before St. Patrick's Day in a mild panic—she'd promised to bring something green to the office party but couldn't decide between cookies, brownies, or something that felt more special. I suggested these green velvet cupcakes, and when she texted me a photo of her coworkers' faces lighting up as she set them down, I knew I'd stumbled onto something worth sharing. The magic isn't just in the color; it's that subtle cocoa undertone that keeps people guessing what makes them taste so good.
I made these one rainy afternoon while my nephew watched cartoons in the living room, and he came wandering into the kitchen the exact moment I pulled them from the oven. The kitchen smelled like chocolate and spring somehow, which doesn't quite make sense until you taste one—then it clicks. He declared them "the best cupcakes ever" before I'd even frosted them, which felt like the highest compliment a seven-year-old could give.
Ingredients
- All-purpose flour (1 1/4 cups): This is your foundation, and measuring by weight if you can makes a real difference in how tender these turn out.
- Granulated sugar (3/4 cup): Don't skip this or cut back—it's what keeps the crumb moist and gives the cake structure.
- Unsweetened cocoa powder (1/4 cup): This is the secret weapon that makes people wonder why green velvet tastes so much better than regular vanilla.
- Baking soda (1/2 teaspoon): Works with the vinegar to create that tender crumb and activate the cocoa flavor.
- Salt (1/4 teaspoon): A pinch does wonders for balancing sweetness and deepening chocolate notes.
- Buttermilk (2/3 cup, room temperature): This is non-negotiable—it's what gives the batter that perfect tang and keeps things moist.
- Vegetable oil (1/2 cup): Oil keeps these cupcakes tender longer than butter would; they'll stay moist for days if you let them.
- Eggs (2 large, room temperature): Room temperature eggs blend better and create a smoother batter—trust me on this one.
- Vanilla extract (1 teaspoon): A good vanilla makes all the difference in the final flavor.
- Distilled white vinegar (1 teaspoon): This sounds odd but it's crucial—it reacts with the baking soda and adds a subtle brightness.
- Green gel food coloring (1 tablespoon): Gel coloring won't thin your batter like liquid would, so your cupcakes stay fluffy.
- Cream cheese (8 oz, softened): Softened means it'll blend smoothly with the butter; don't use cold cream cheese or you'll fight for a lumpy frosting.
- Unsalted butter (1/4 cup, softened): The balance of cream cheese and butter creates that signature tangy-but-not-too-tart frosting.
- Powdered sugar (2 cups, sifted): Sifting removes lumps and makes the frosting silky instead of grainy.
- Vanilla extract (1 teaspoon for frosting): This echoes the vanilla in the cake and ties everything together.
Tired of Takeout? 🥡
Get 10 meals you can make faster than delivery arrives. Seriously.
One email. No spam. Unsubscribe anytime.
Instructions
- Set the stage:
- Preheat your oven to 350°F and line your muffin tin with liners—this prevents sticking and makes serving effortless. If you forget the liners, just give each cup a quick spray of cooking oil instead.
- Build the dry foundation:
- Whisk together your flour, sugar, cocoa powder, baking soda, and salt in a large bowl, breaking up any cocoa lumps as you go. This step distributes the leavening evenly so every cupcake bakes at the same rate.
- Blend the wet team:
- In a separate bowl, whisk the buttermilk, oil, room-temperature eggs, vanilla, vinegar, and green coloring until the mixture is smooth and uniformly colored. The vinegar will react slightly with the baking soda, so you want everything mixed before they meet.
- Marry wet and dry gently:
- Pour the wet mixture into the dry ingredients and stir just until combined—overmixing develops gluten and makes the cupcakes tough and dense. A few flour streaks are fine; stop as soon as you don't see them.
- Fill with care:
- Divide the batter evenly among the liners, filling each about two-thirds full so they have room to rise without overflowing. I use an ice cream scoop for consistency, which also helps them bake evenly.
- Bake to golden perfection:
- Bake for 16 to 18 minutes until a toothpick inserted into the center comes out clean with no wet batter clinging to it. They'll look slightly underbaked when you pull them out, but they continue cooking as they cool.
- Cool with patience:
- Let them rest in the tin for 5 minutes, then transfer to a wire rack to cool completely—this prevents condensation from making them soggy. Frosting warm cupcakes will melt your frosting, so this step matters.
- Make the frosting magic:
- Beat the softened cream cheese and butter together until fluffy, then gradually add the sifted powdered sugar to avoid a cloud of sugar dust and lumps. Once combined, add vanilla and beat until the frosting is light, spreadable, and pale.
- Crown with frosting:
- Spread or pipe frosting generously onto each cooled cupcake, creating swirls that catch the light. A chilled frosting is easier to work with, so refrigerate for 15 minutes if yours is too soft.
- Add the finishing touch:
- Sprinkle with green sprinkles or shamrock candies while the frosting is still soft so they stick. Store in an airtight container in the fridge for up to three days.
 Save to Pinterest
 The moment someone realized these cupcakes tasted like chocolate hiding under green frosting, the whole conversation shifted. My friend Sarah said, "Wait, why does this taste better than a regular cupcake?" and I realized that's exactly what makes these special—they surprise you. It became the kind of recipe people actually ask for the second time.
The Secret Behind the Color
Green velvet isn't just about dumping food coloring into a basic vanilla cake—it's a specific tradition that blends cocoa, acidity, and color into something genuinely delicious. The cocoa powder creates a subtle chocolate flavor that feels indulgent without overpowering the cake, while the green coloring makes it feel festive and fun. What makes this work is the chemistry: the vinegar reacts with the baking soda to keep everything tender and moist, and the cocoa adds a sophistication that plain green cupcakes completely lack.
Why Cream Cheese Frosting Wins
Buttercream alone would make these cupcakes sweet on top of sweet, which is fine but forgettable. Cream cheese frosting cuts through that sweetness with just enough tang to make your taste buds perk up, and it complements the cocoa undertone beautifully. The frosting is thick enough to hold decorations, fluffy enough to feel luxurious, and tangy enough to make people pause and actually taste it instead of just eating frosting for the sake of it.
Timing and Make-Ahead Strategy
These cupcakes are designed for people with imperfect schedules, which means most of us. You can bake them a full day ahead, store them covered at room temperature, and frost them the morning of your event—or even a few hours before. The frosting will hold up beautifully in an airtight container in the fridge for three days, and the cupcakes themselves stay moist and delicious for up to two days after baking.
- Make the cupcakes the day before if you're feeling prepared, or the morning of if you're like me and enjoy a little controlled chaos.
- Frost them no more than 6 hours before serving so the frosting stays creamy and fresh-tasting.
- Store leftovers covered in the fridge, and they'll taste just as good three days later as they did the first day.
 Save to Pinterest
 These cupcakes have a way of turning an ordinary office party or family gathering into something worth remembering. They're the kind of recipe that tastes impressive but feels approachable, which is the best kind to have in your rotation.
Questions & Answers
- → What gives the cupcakes their green color?
Green gel food coloring is used to achieve a vibrant green hue without affecting batter consistency.
- → Can I make these cupcakes dairy-free?
Yes, substitute cream cheese, butter, and buttermilk with plant-based alternatives for a dairy-free version.
- → How do I know when the cupcakes are done baking?
Insert a toothpick into the center; it should come out clean when fully baked, usually after 16–18 minutes.
- → What ingredients add moisture to the cupcakes?
Buttermilk and vegetable oil contribute to the moist texture and tender crumb.
- → What’s the best way to apply the frosting?
Use a spatula or piping bag to spread or pipe the creamy vanilla frosting evenly once cupcakes have cooled completely.