 Save to Pinterest
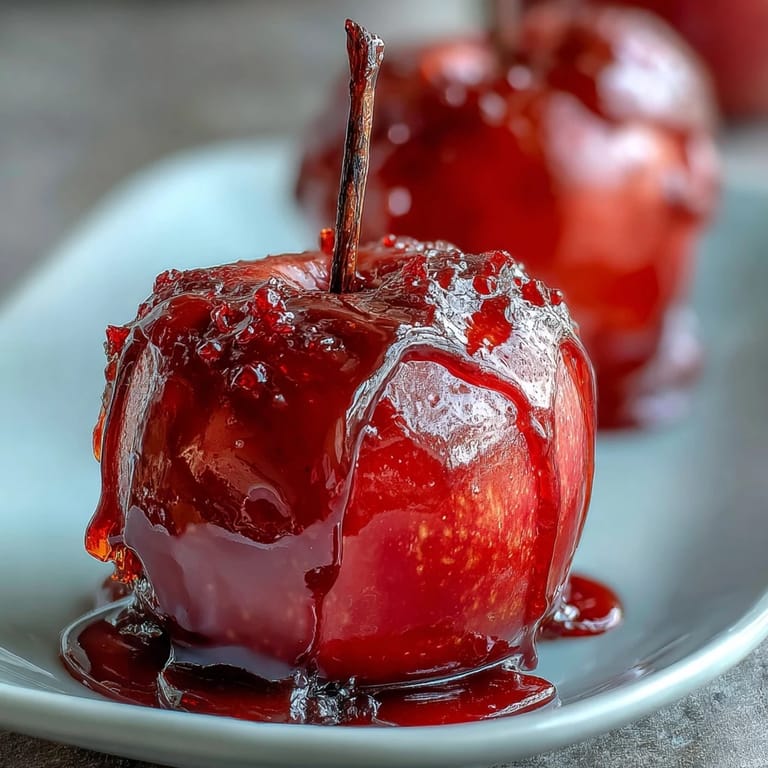
 My aunt showed up at a county fair with a basket of candy apples one summer, and I watched grown adults literally fight over them—teeth marks on the shiny red shell, sticky fingers, pure joy. That's when I realized these weren't just nostalgic carnival treats; they were edible gold that made people genuinely happy. The magic isn't complicated: a few pantry staples transform into a glass-like coating that cracks between your teeth, giving way to tart apple beneath. Since then, I've made them for Halloween parties, bake sales, and lazy Sunday afternoons just because the smell of cooking sugar brings something unforgettable into the kitchen.
I made these for my daughter's third-grade class party, and one kid asked if they were "real magic apples." His teacher caught him mid-bite, red syrup everywhere, completely mesmerized—and suddenly everyone wanted one. That moment cemented it for me: candy apples aren't fancy, but they feel special because they're made by hand, and people taste that care.
Ingredients
- Granny Smith or Gala apples (8 medium): Pick firm apples—soft ones will collapse under the heat of the candy, and make sure they're completely dry or the coating won't stick properly.
- Granulated sugar (2 cups): This is your base; it crystallizes into that satisfying hard shell when cooked to the right temperature.
- Light corn syrup (1 cup): Corn syrup prevents the sugar from crystallizing too early, keeping your coating smooth and glossy instead of grainy.
- Water (1/2 cup): The liquid helps dissolve the sugar at the start; don't skip this or your mixture will burn.
- Red food coloring (1/2 tsp): Gel coloring tends to hold its hue better than liquid, but either works—just don't use natural dyes unless you want muted, unpredictable results.
- Wooden sticks (8): Roughen them slightly with sandpaper if they're brand new, so the apple stays gripped as it heats up.
- Parchment paper or nonstick spray: This prevents the hardened candy from bonding to your sheet and ruining your apples.
Tired of Takeout? 🥡
Get 10 meals you can make faster than delivery arrives. Seriously.
One email. No spam. Unsubscribe anytime.
Instructions
- Set up your workspace:
- Line a baking sheet with parchment paper or give it a light coating of nonstick spray—this is non-negotiable if you want the apples to release cleanly. Insert wooden sticks firmly into the top of each apple (where the stem was) and arrange them where you can reach them quickly.
- Build the candy base:
- Pour sugar, corn syrup, and water into a heavy-bottomed saucepan and stir gently until combined. Heavy-bottomed is crucial here because thin pans create hot spots that burn your candy unevenly.
- Heat without stirring:
- Place the pan over medium-high heat and bring to a boil without touching it after that initial stir. Attach a candy thermometer to the side of the pan, making sure the bulb isn't touching the bottom.
- Watch the temperature climb:
- This is the patient part—it takes 15 to 20 minutes to reach 300°F (hard crack stage), and you're basically just listening to the bubbles and trusting the thermometer. The mixture will go from clear to pale to golden amber as the temperature climbs.
- Add the color at the finish line:
- The moment the thermometer hits 300°F, pull the pan off heat and immediately stir in the red food coloring until it's evenly distributed. The syrup will darken slightly, but resist the urge to add more color—it'll deepen as it cools.
- Dip with confidence and speed:
- Working quickly (the syrup cools fast), tilt the pan slightly and dip each apple, rolling it to coat all sides, then let the excess drip back into the pan. If the syrup starts to thicken, set it back over low heat for 30 seconds—it'll loosen right up.
- Let them set at room temperature:
- Place each coated apple on your prepared sheet and don't move them for at least 15 minutes while the candy hardens into that satisfying glass-like shell.
 Save to Pinterest
 There's a split second when you pull that first apple out of the hot candy and watch it cool, seeing the shine develop across the surface like it's coming to life, and that's when you know you've done something right. My kitchen smells like autumn and sugar, and somehow that translates into people feeling cared for.
The Temperature Sweet Spot
Hard crack stage at 300°F sounds scientific and intimidating, but it's actually the difference between a candy shell that shatters versus one that sticks to your teeth or never sets at all. I learned this the hard way when I guessed and ended up with apples that were half-sticky, half-hard—a mess. A reliable candy thermometer is worth every penny because eyeballing it never works, no matter how much cooking experience you think you have.
Customization and Toppings
The beauty of candy apples is that the classic red shell is just the starting point—the moment the candy is tacky but not fully hard, you can roll it in chopped nuts, sprinkles, crushed candy canes, or even edible glitter. I've done pistachios for an elegant look, rainbow sprinkles for kids' parties, and crushed pretzels for a salty-sweet combo that people go absolutely crazy for. The key is working fast because the coating hardens within minutes.
Storage, Serving, and Shelf Life
Candy apples taste best when eaten the same day or within a few hours while the shell is still crisp and the contrast between coating and fruit is at its peak. If you need to store them, wrap each one in cellophane and keep them in a cool, dry place away from humidity—moisture is the enemy because it softens the hard candy shell.
- Serve them on a stick for easy eating, and maybe have napkins nearby because the candy will absolutely get on everyone's hands and faces.
- These are best as a standalone treat rather than paired with a meal, since the concentrated sweetness is pretty intense on a full stomach.
- If you're making them for a party, plan to dip them within 30 minutes of serving to catch that perfect window between hard and fresh.
 Save to Pinterest
 There's something deeply satisfying about making candy apples; it's old-fashioned in the best way, and it connects you to county fairs and childhood memories while still feeling achievable in a regular kitchen. Hand someone a candy apple and you've given them more than sugar and fruit—you've given them a moment.
Questions & Answers
- → What type of apples work best?
Firm apples like Granny Smith or Gala hold up well and provide a crisp contrast to the sweet candy shell.
- → How do I know when the syrup is ready?
The syrup should reach the hard crack stage at about 300°F (149°C), producing a brittle, glossy coating once cooled.
- → Can I add decorations to the candy coating?
Yes, roll the apples in chopped nuts or sprinkles immediately after dipping to add texture and flair before the coating hardens.
- → What safety tips should I follow when working with hot syrup?
Handle the hot syrup carefully to avoid burns. Use a heavy-bottomed saucepan and keep children away during the boiling process.
- → How long do the coated apples stay fresh?
They are best enjoyed within a few hours after coating as the candy shell maintains crispness before moisture softens it.