 Save to Pinterest
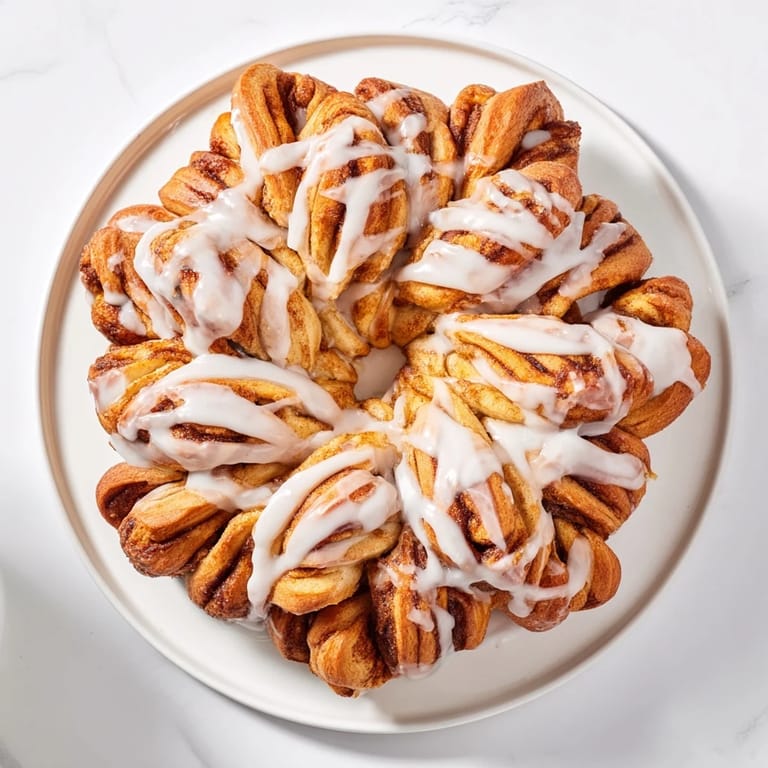
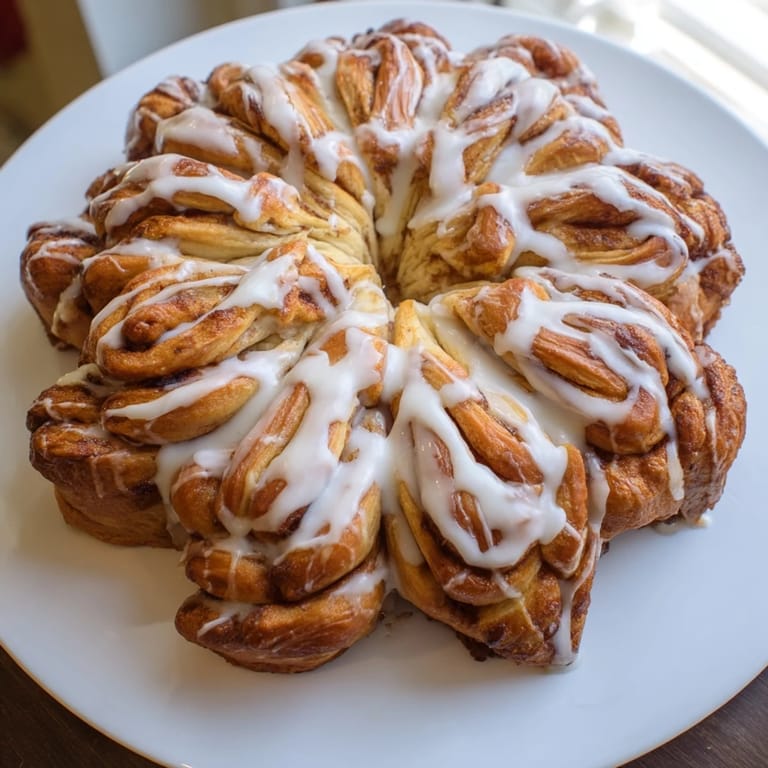
 A few winters ago, I was scrolling through holiday decorations online when I stumbled upon a photo of a cinnamon roll shaped like a snowflake. It looked impossibly intricate, but also somehow inviting, like something that belonged on a kitchen counter surrounded by steam from hot chocolate. I decided to try making it, half expecting disaster, but what emerged from the oven was pure magic—soft, twisty, and golden, with the kind of aroma that makes people wander into the kitchen asking what you're making. This became the centerpiece of every winter gathering after that.
I remember the first time I brought this to a holiday brunch, my neighbor took one look at it and asked if I'd ordered it from the bakery down the street. When I told her I'd made it, she actually gasped. That small moment—the surprise, the realization that something this striking came from my oven—is why I keep making it. There's something special about creating something that looks like it belongs in a magazine.
Ingredients
- All-purpose flour (3 1/4 cups): The foundation of your dough; make sure it's fresh because yeast relies on gluten structure to rise properly.
- Granulated sugar (1/4 cup): This feeds the yeast and helps activate it, so don't skip it or reduce it.
- Active dry yeast (2 1/4 tsp): Check the expiration date; old yeast won't rise, and you'll end up with a dense disaster.
- Warm milk (3/4 cup): Too hot and you'll kill the yeast; too cold and nothing happens—aim for that sweet spot around 110°F where it feels warm but not uncomfortable on your wrist.
- Unsalted butter (1/4 cup melted for dough, 1/4 cup softened for filling): Butter creates that tender, rich texture; the softened butter for filling should be spreadable but still hold its shape.
- Large egg (room temperature): Room temperature eggs blend smoothly into dough without creating lumps or cooling things down.
- Salt (1/2 tsp): This enhances flavor and helps control yeast fermentation so the dough doesn't over-rise.
- Packed light brown sugar (1/2 cup for filling): Brown sugar's molasses adds deeper warmth than white sugar, and packing it ensures you get the right amount in each bite.
- Ground cinnamon (2 tsp): This is where the snowflake gets its personality; don't be shy with it, and make sure your cinnamon smells fragrant when you open the jar.
- Powdered sugar (1 cup for icing): This dissolves smoothly into the icing and won't leave grittiness.
- Milk for icing (2-3 tbsp): Use it gradually; you want icing that drizzles, not runs or sits thick like cement.
- Pure vanilla extract (1/2 tsp): The real thing makes a difference; imitation has a slightly harsher edge.
Tired of Takeout? 🥡
Get 10 meals you can make faster than delivery arrives. Seriously.
One email. No spam. Unsubscribe anytime.
Instructions
- Wake up the yeast:
- Combine warm milk, sugar, and yeast in a large bowl and let it sit for 5–10 minutes until it looks frothy and smells alive. This is your proof that the yeast is ready to work—you'll see bubbles and foam on the surface.
- Bring the dough together:
- Add melted butter, egg, and salt to the yeast mixture, then gradually mix in flour until everything comes together into a soft, shaggy dough. Don't overmix at this stage; you're just incorporating ingredients.
- Develop the dough:
- Knead on a lightly floured surface for 5–7 minutes until the dough becomes smooth, elastic, and springs back when you poke it. You'll feel the transformation from rough to silky.
- First rise:
- Place dough in a greased bowl, cover with a towel, and let it rise in a warm, undisturbed spot for about 1 hour or until it's doubled in size. A closed oven (turned off) or a corner away from drafts works perfectly.
- Prep your workspace:
- Preheat your oven to 350°F and line a baking sheet with parchment paper. This prevents sticking and makes cleanup effortless.
- Layer the dough:
- Punch down the risen dough and divide it into 3 equal pieces. Roll each into a 12-inch circle; it doesn't need to be perfect—slightly oval is totally fine.
- Build the filling layers:
- Place the first dough circle on the baking sheet, spread half the softened butter over it, and sprinkle with half the cinnamon-sugar mixture. Top with the second circle, add the remaining butter and cinnamon sugar, then finish with the third circle on top.
- Create the snowflake shape:
- Place a small glass in the center of the dough stack—this keeps the middle protected while you cut. Using a sharp knife, cut the dough into 16 equal strips radiating outward from the glass, like spokes on a wheel.
- Twist the magic:
- Take two adjacent strips and twist them away from each other twice, then pinch the ends together to form a pointed flake tip. Repeat this with each pair until all 16 strips become a snowflake.
- Remove the glass and final rise:
- Carefully pull out the glass from the center, cover the snowflake with a towel, and let it rise for 15 minutes. This short rise makes the pastry light and airy before baking.
- Bake to golden:
- Bake for 22–25 minutes until the top turns golden brown and smells absolutely incredible. The edges will be darker than the center, which is exactly right.
- Cool and glaze:
- Let the snowflake cool for 10 minutes—this sets the structure so it doesn't fall apart. Whisk together powdered sugar, milk, and vanilla until smooth, then drizzle it generously over the warm pastry.
 Save to Pinterest
 One Christmas morning, my daughter helped me pull this snowflake apart piece by piece, and we both got sticky fingers covered in cinnamon and icing. That small, messy moment—laughing while eating something we'd made together—reminded me that recipes aren't just about the food; they're about the people around the table.
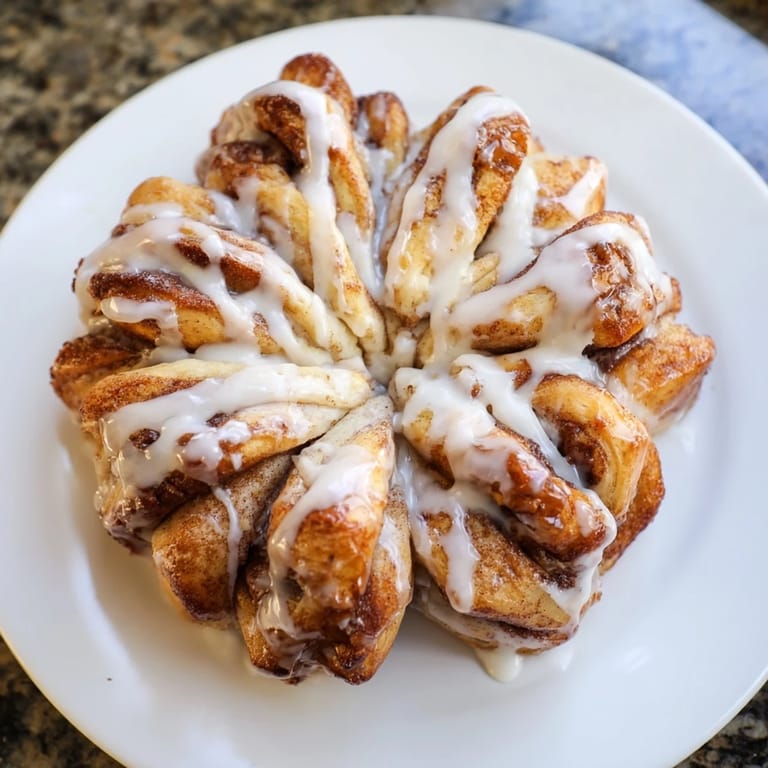
The Magic of Layering
What makes this snowflake special isn't the shape—it's those three layers of dough with two layers of cinnamon-sugar filling sandwiched between them. Every pull-apart piece you get is actually a multi-layered slice with cinnamon filling throughout. The middle piece will be the most loaded with filling because all three layers meet there, and somehow everyone fights over those center pieces. Understanding this is key because it means you're not making a hollow pastry; you're creating something with real substance and flavor in every bite.
Make-Ahead and Storage
This snowflake is actually forgiving with timing, which makes it perfect for holidays when you're juggling a thousand things. You can prepare it through the twist stage, cover it tightly, and refrigerate it overnight. In the morning, just let it come to room temperature for 15–20 minutes before baking. Leftovers keep for a day or two wrapped loosely on the counter, and they're almost better on the second day when flavors have melded together. You can also freeze the unbaked snowflake before the final rise, then bake it straight from the freezer, adding 5–10 extra minutes to the baking time.
- Refrigeration slows the rising, which actually intensifies flavor because the yeast has more time to develop complexity.
- Never wrap it airtight after baking because the icing needs air circulation or it stays sticky.
- If you're making it for a specific time, remember that active dough rises faster in warm kitchens, so adjust your timeline accordingly.
Variations That Work
Once you master the basic snowflake, the filling is your playground. I've made versions with chopped toasted pecans stirred into the cinnamon sugar, and another time I added raisins soaked in a little rum for a fancy-feeling brunch. The icing is equally flexible—swap vanilla for almond extract, add a pinch of cardamom if you're feeling adventurous, or even drizzle with a cream cheese icing if you want something tangy. A cream version using half heavy cream and half milk makes the dough even richer and more tender, though it rises slightly slower. The architecture stays the same; only the flavors shift.
 Save to Pinterest
 This snowflake is the kind of recipe that feels like a gift you're giving to everyone who eats it. Once you've made it once, you'll find yourself making it every winter, and it becomes part of your kitchen story.
Questions & Answers
- → How do I achieve a soft, pillowy dough?
Ensure warm milk and proper yeast activation before mixing. Knead thoroughly until smooth, then allow the dough to rise in a warm spot until doubled for best texture.
- → What is the purpose of stacking dough circles?
Stacking layers with cinnamon butter creates distinct swirls and allows the dough to be cut and twisted into a snowflake shape, adding visual appeal and texture.
- → Can I substitute ingredients for richer flavor?
Replacing half the milk with heavy cream enriches the dough, while adding chopped toasted pecans or raisins to the filling provides extra texture and taste.
- → How do I make the snowflake shape without tearing the dough?
Use a small glass to mark the center without cutting through, then cut evenly into strips. Twist paired strips gently and pinch ends to avoid tearing.
- → What is the best way to apply the icing?
Whisk icing ingredients into a smooth glaze, let the baked snowflake cool slightly, then drizzle evenly for a sweet finish without melting too quickly.