 Save to Pinterest
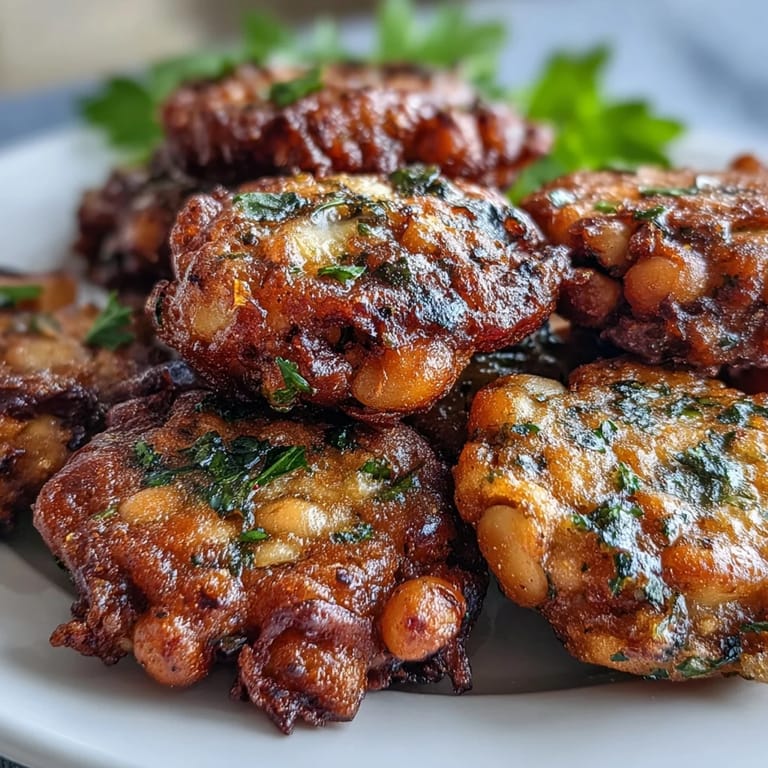
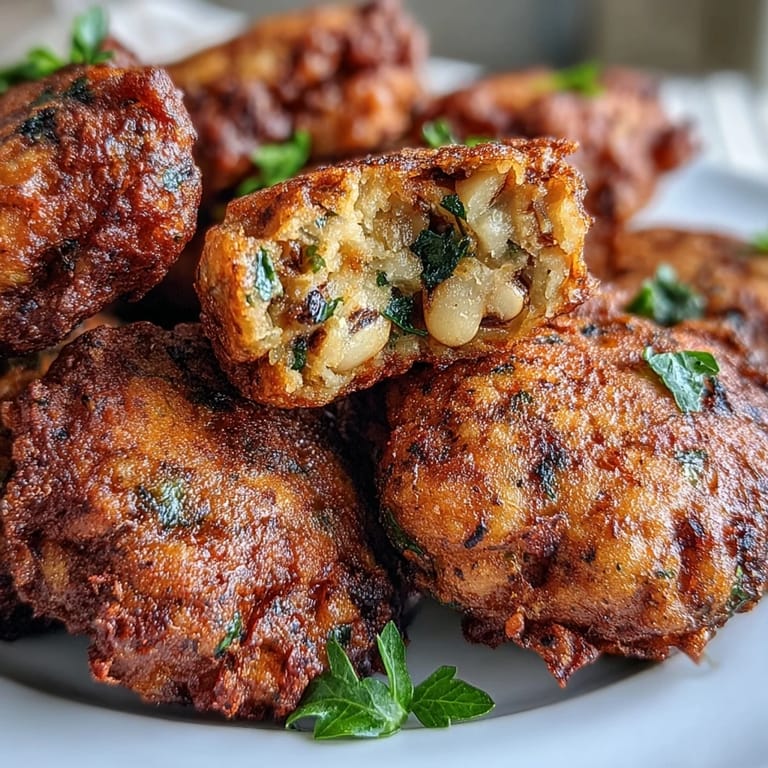
 My neighbor once brought a plate of these golden fritters to a backyard potluck, and I watched them disappear in minutes while everyone clustered around for the recipe. She laughed and said they were so simple, just black-eyed peas transformed into something crispy and irresistible, passed down through her family like a quiet treasure. Since then, I've made them dozens of times, and every batch reminds me that the best dishes don't need fancy ingredients—just good technique and a little patience.
I still think about the first time I fried a batch in my tiny apartment kitchen, how the smell filled every room and my roommate came out asking what I was making before they even saw the fritters. The oil popped and hissed in that satisfying way that means you're doing something right, and when I bit into one, slightly warm from the skillet, I understood why my neighbor protected that recipe like a secret.
Ingredients
- Black-eyed peas (2 cups cooked, drained): The backbone of these fritters—use canned if fresh isn't available, just rinse them well to remove excess sodium and starch.
- Onion (1 small, finely chopped): This brings sweetness and depth; fine chopping ensures even distribution through the batter.
- Garlic (2 cloves, minced): A must-have for warmth and character that keeps people asking what the secret ingredient is.
- Fresh parsley or cilantro (2 tablespoons, chopped): Optional but worth it for a subtle herbaceous note that lifts the whole dish.
- Eggs (2 large): These bind everything together while adding richness; don't skip them.
- All-purpose flour (3/4 cup): Just enough to hold the fritters together without making them dense or gummy.
- Salt (1 teaspoon): Season generously—the peas absorb salt better than you'd think.
- Black pepper (1/2 teaspoon): Freshly ground makes a noticeable difference in brightness.
- Smoked paprika (1/2 teaspoon, optional): Adds depth and a whisper of smokiness that makes people wonder what they're tasting.
- Cayenne pepper (1/4 teaspoon, optional): A gentle heat that builds slowly; add less if you prefer mild, more if you like a kick.
- Vegetable oil (for frying): Keep it neutral and fresh; old oil muddles the flavor and makes the fritters taste heavy.
Tired of Takeout? 🥡
Get 10 meals you can make faster than delivery arrives. Seriously.
One email. No spam. Unsubscribe anytime.
Instructions
- Mash those peas:
- Dump your cooked black-eyed peas into a large bowl and go at them with a fork or potato masher until mostly smooth, but don't overdo it—those little pieces of texture matter when you bite in. You want something between a rough paste and whole beans, a feeling you'll recognize once your fork stops making progress.
- Build your batter:
- Add the onion, garlic, parsley if using, eggs, flour, salt, pepper, and any spices right to that bowl and stir until everything comes together into a thick, cohesive batter that holds its shape. This should feel substantial, not loose or wet.
- Heat the oil:
- Pour about half an inch of vegetable oil into a large skillet and set it over medium heat, letting it warm for a couple of minutes until it shimmers but doesn't smoke. You'll know it's ready when a tiny drop of batter sizzles immediately on contact.
- Fry with care:
- Using a spoon, scoop heaping tablespoons of batter and gently slide them into the hot oil, then flatten each one slightly with the back of the spoon—this helps them cook evenly and get properly crispy. Never crowd the pan; give each fritter space to breathe and brown without steaming.
- Watch for golden:
- Let them fry for about 2 to 3 minutes on the first side, watching until they turn a deep golden brown, then flip and cook the other side for another 2 to 3 minutes. When they're done, they should feel firm and sound crispy when you tap them with your spoon.
- Drain and serve:
- Lift each fritter out with a slotted spoon and place it on a paper towel-lined plate where the excess oil will drain away. Serve them warm, ideally within minutes of frying when the contrast between crispy exterior and soft interior is at its peak.
 Save to Pinterest
 There's a moment, right after you transfer the first batch to that paper towel plate, where the kitchen goes quiet for a second and you realize you've made something special. My family now requests these every time there's a gathering, and I've noticed how they disappear from the appetizer spread while people are still deciding on the main course.
Why the Texture Matters
That slightly lumpy consistency in the batter, the one you might be tempted to smooth out, is actually what gives these fritters their character and prevents them from turning into dense pucks. I learned this by over-processing a batch once, running them through a food processor until they were completely smooth, and the result was disappointingly compact. Now I stick with the fork and stop while there's still some pleasant coarseness to the mixture.
Customizing Your Dipping Sauce
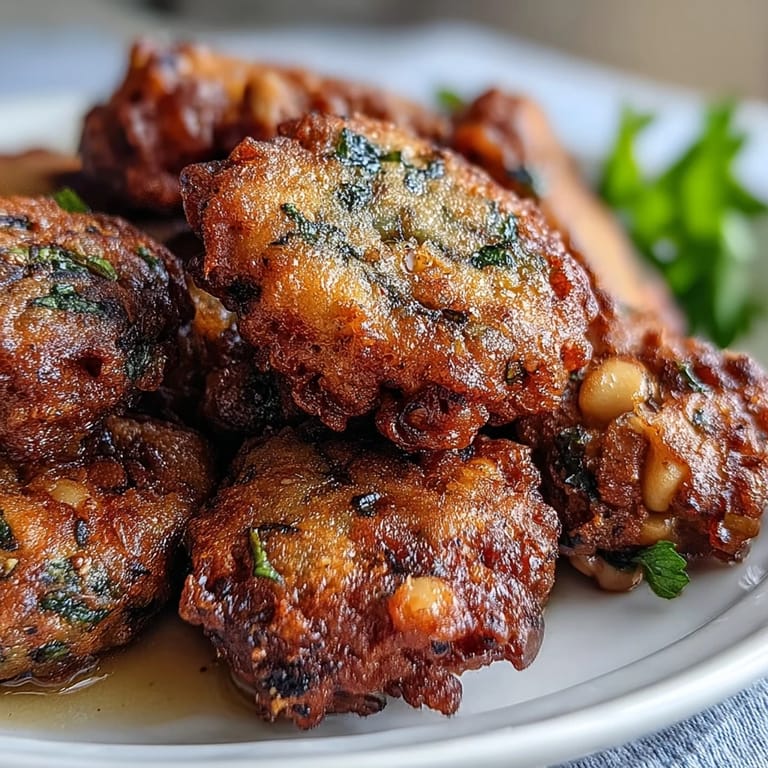
These fritters are genuinely good plain, but they transform when paired with the right sauce—and the beauty is you probably already have what you need in your kitchen. A simple yogurt mixed with a little garlic and lemon juice works beautifully, or go spicy with hot sauce or sriracha if that's your style. I've also mixed mango chutney with Greek yogurt and it became my go-to for impressing guests without any extra effort.
Storing and Reheating
Leftover fritters keep for about three days in an airtight container in the refrigerator, and they're still delicious cold or gently reheated in a 350-degree oven until they regain their crispness. I've found that the microwave is tempting but disappointing, turning them soft and rubbery, while the oven brings back that texture you fell in love with. You can also freeze them before frying and cook them straight from frozen—add just a minute or two extra to the frying time.
- Keep fried fritters warm on a paper towel-lined baking sheet in a 200-degree oven while you finish the batch.
- Don't refrigerate while still warm; let them cool completely first to avoid condensation making them soggy.
- If you want to meal prep, you can refrigerate the raw batter for up to two days and fry fresh batches when needed.
 Save to Pinterest
 These fritters have become my answer to the eternal question of what to bring to a gathering where you want to contribute something home-cooked and memorable. Every time someone reaches for one, then another, I'm reminded that the simplest recipes, made with care, are often the ones that stick with people.
Questions & Answers
- → Can I use canned black-eyed peas?
Yes, canned black-eyed peas work perfectly. Drain and rinse them thoroughly before mashing. You'll need approximately two 15-ounce cans to equal 2 cups of cooked peas.
- → What's the best oil temperature for frying?
Heat oil to approximately 350°F (175°C). Test by dropping a small amount of batter—if it sizzles immediately and rises to the surface, the oil is ready. Medium heat maintains the ideal temperature throughout cooking.
- → Can I make the batter ahead of time?
Yes, prepare the batter up to 4 hours before frying. Store covered in the refrigerator. The flour may absorb more moisture over time, so add a tablespoon of water if the batter seems too thick when ready to cook.
- → What dipping sauces pair well?
Traditional options include plain yogurt dip with herbs, spicy hot sauce for contrast, or sweet mango chutney. Garlic aioli, sriracha mayo, or a simple lemon-tahini drizzle also complement the flavors beautifully.
- → How do I store and reheat leftovers?
Store cooled fritters in an airtight container in the refrigerator for up to 3 days. Reheat in a 375°F oven for 5-7 minutes to restore crispiness. Avoid microwaving as they become soggy.
- → Can I bake instead of fry?
Baking is possible but yields different texture. Brush with oil and bake at 400°F for 20-25 minutes, flipping halfway. They won't be as crispy, but still delicious. Consider an air fryer at 375°F for 12-15 minutes for better results.