 Save to Pinterest
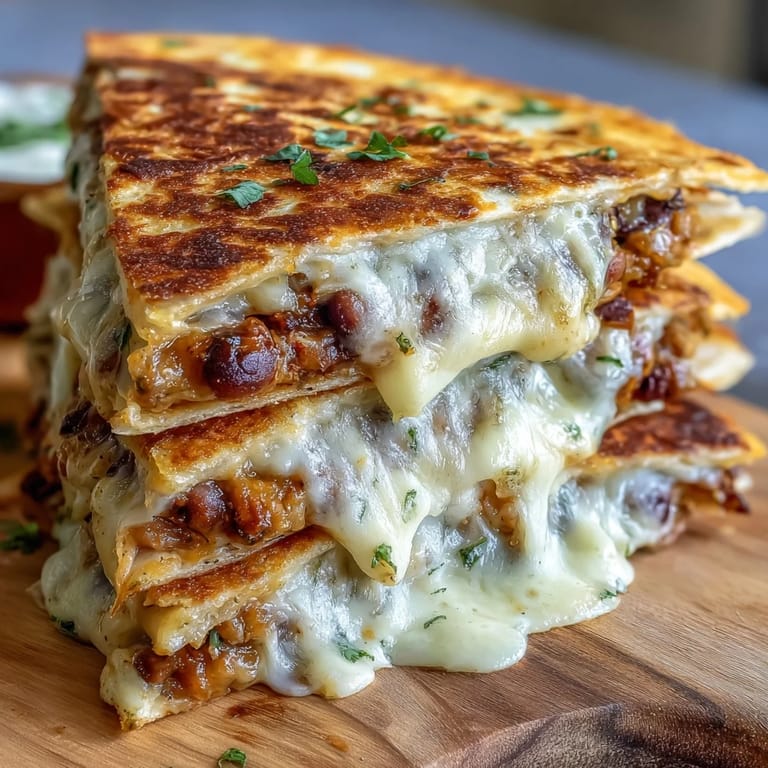
 My neighbor handed me a container of black-eyed peas one afternoon with barely an explanation, just a knowing smile. I stood in my kitchen wondering what to do with them, and somehow cheese and tortillas seemed like the obvious answer. That first quesadilla came out of the pan golden and crispy, the filling warm and earthy, and I realized I'd stumbled onto something that would become a regular rotation in my weeknight cooking. It's the kind of dish that feels both satisfying and effortless, like you've figured out a small kitchen secret.
I made a batch of these for my sister's impromptu dinner party when she'd invited more people than she'd planned for, and honestly they saved the evening. Everyone went back for seconds, and I watched people's faces light up when they hit that moment where the cheese strings and the creamy peas come together. It became the dish I brought to potlucks after that, the one people always asked about.
Ingredients
- Cooked black-eyed peas: If you're using canned, drain and rinse them well to keep the filling from getting watery and muddy tasting.
- Olive oil: Just a tablespoon for sautéing the aromatics, nothing fancy needed here.
- Onion and garlic: Finely diced onion softens into sweetness while garlic brings that savory backbone that makes people ask what you put in it.
- Ground cumin and smoked paprika: These two spices do almost all the heavy lifting, giving warmth and a hint of smokiness without overwhelming the delicate pea flavor.
- Lime juice: A tablespoon brightens everything up at the end, cutting through the richness and making each bite taste fresher.
- Fresh cilantro: Optional but honestly worth keeping on hand, it adds a peppery freshness if you're in the mood.
- Flour tortillas: Eight-inch ones are the perfect size for home cooking, substantial but not unwieldy.
- Shredded cheddar or Monterey Jack cheese: Either works beautifully, though I've found Monterey Jack melts a touch more evenly and smoothly.
- Butter or neutral oil: For frying the quesadillas, butter gives better color and flavor if you're not watching your dairy intake.
Tired of Takeout? 🥡
Get 10 meals you can make faster than delivery arrives. Seriously.
One email. No spam. Unsubscribe anytime.
Instructions
- Sauté your aromatic base:
- Warm olive oil in a skillet over medium heat and let the diced onion soften for 3 to 4 minutes until it turns translucent and sweet-smelling. Add the minced garlic and cook just long enough for the aroma to bloom, about a minute, or you risk it turning bitter.
- Build flavor with spices:
- Stir in the black-eyed peas along with cumin, smoked paprika, salt, and pepper, letting everything heat through and the spices toast slightly into the oil for 2 to 3 minutes. You'll notice the whole mixture smells warm and inviting at this point.
- Mash and finish:
- Remove from heat and mash the peas coarsely with a potato masher or fork, leaving some texture so it doesn't feel like baby food. Stir in lime juice and cilantro if you have it, tasting and adjusting seasoning as you go.
- Assemble the quesadillas:
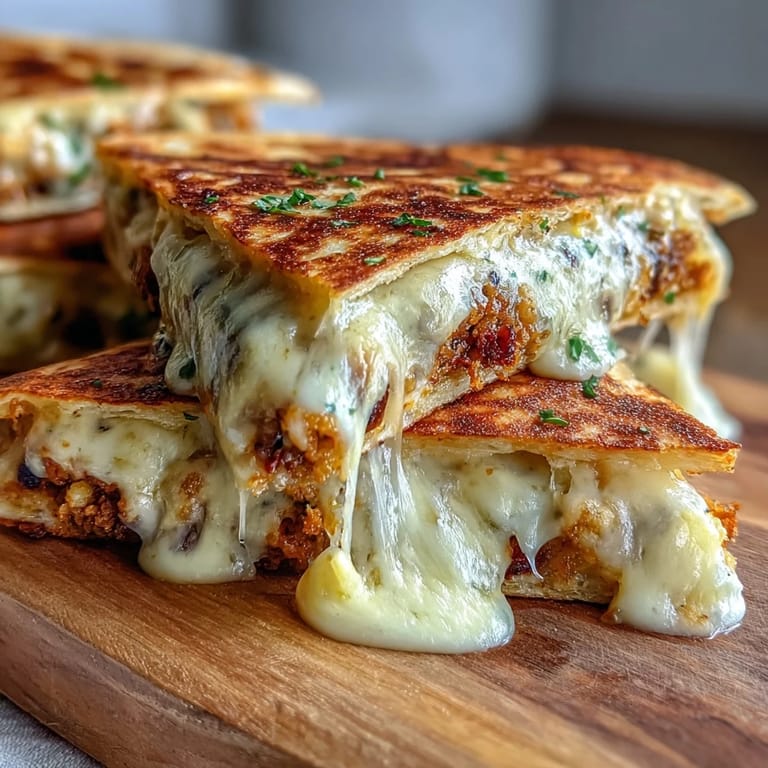
- Lay out four tortillas and divide the filling evenly, spreading it over just half of each tortilla so folding is easy. Sprinkle cheese generously over the filling, then fold each tortilla in half and press gently to keep everything snug inside.
- Fry to golden crispy perfection:
- Heat a large skillet over medium heat with a little butter or oil and place one or two quesadillas in the pan, cooking 2 to 3 minutes per side until the exterior is golden brown and the cheese is visibly melted. Work in batches and add a bit more butter between batches so each one gets that beautiful crust.
- Slice and serve:
- Let them rest just a moment so they're not mouth-burning hot, then slice into wedges and serve with salsa, sour cream, or guacamole for dipping.
 Save to Pinterest
 There was a quiet moment one evening when I was making these alone, just the sound of the tortillas hitting the hot pan and sizzling, and I realized this simple dish had become my version of comfort food. It's the kind of cooking that doesn't demand your full attention but rewards it when you give it, and somehow that feels important.
Variations to Keep Things Interesting
Once you get comfortable with the base recipe, it's fun to start playing around. Sautéed bell peppers or jalapeños stirred into the filling add color and either sweetness or heat depending on what you choose. I've also tried corn tortillas instead of flour, which gives a nuttier taste and makes the whole thing feel a bit more authentic if that's the vibe you're after.
Making It Work for Different Diets
This recipe adapts easily if you need it to, and I've had success with several swaps over the years. Vegan cheese melts fine here, especially if you grab a good quality brand that actually browns and doesn't just sit there looking sad. For gluten-free, just make sure your tortillas say certified, and everything else stays exactly the same, so you're not adding extra complication to an already simple dish.
Timing and Storage Tips
The filling can be made a day or two ahead and stored in the fridge, which makes weeknight assembly almost embarrassingly quick. I usually assemble and fry just before serving since the quesadillas are best warm and crispy, though leftovers reheat decently in a dry skillet over low heat if you have them.
- Make the filling ahead to save time on busy weeknights.
- Fry the quesadillas fresh right before eating for the best texture and melted cheese.
- Store leftovers in an airtight container for up to three days and reheat gently in a skillet.
 Save to Pinterest
 These quesadillas sit somewhere between weeknight dinner and the kind of food that reminds you why you enjoy cooking in the first place. Make them for yourself on a quiet evening or for people you care about, and either way you'll find yourself making them again.
Questions & Answers
- → Can I use dried black-eyed peas instead of canned?
Yes, you can use dried black-eyed peas. Soak them overnight, then cook until tender before using in this filling. You'll need about 1/2 cup dried peas to yield 1 1/2 cups cooked.
- → What type of cheese works best?
Cheddar and Monterey Jack are excellent choices as they melt beautifully. Pepper Jack adds a nice kick, or try a Mexican blend for varied flavors. The key is using a cheese that melts well.
- → How do I store and reheat leftovers?
Store cooled quesadillas in an airtight container in the refrigerator for up to 3 days. Reheat in a skillet over medium heat for best results, or place in a 350°F oven for 5-7 minutes until crisped and heated through.
- → Can I make these vegan?
Absolutely! Use vegan cheese shreds and replace butter with olive oil or plant-based butter. The filling remains naturally flavorful and satisfying without dairy.
- → What toppings complement these quesadillas?
Fresh salsa, sour cream, guacamole, or pico de gallo are classic choices. For extra freshness, try adding sliced avocado, a squeeze of lime, or a sprinkle of additional fresh cilantro.
- → Can I freeze assembled quesadillas before cooking?
Yes, assemble the quesadillas and wrap them individually in plastic wrap, then foil. Freeze for up to 2 months. Cook from frozen, adding 1-2 extra minutes per side.